How to Invite New Remote Users
Once you have created a Cloudica™ account, you can start adding users to your organization.
Account owners and managers can invite new users to register for the company account at any time.
To start getting your employees to register, do the following:
- Click the “Invite” button on the left panel of the dashboard.
- Enter the email addresses of the persons you are inviting into the text box. Separate each entry with a comma or space.
- Click anywhere outside the text box to add the email entry.
- If you want to remove a submitted email entry from the list, just click the email to delete it.
- Click the Set Manager box to open the drop-down menu and select the manager.
- Click the Role box to open the drop-down menu and select the role.
 Repeat the steps if you need to add more members to your organization.
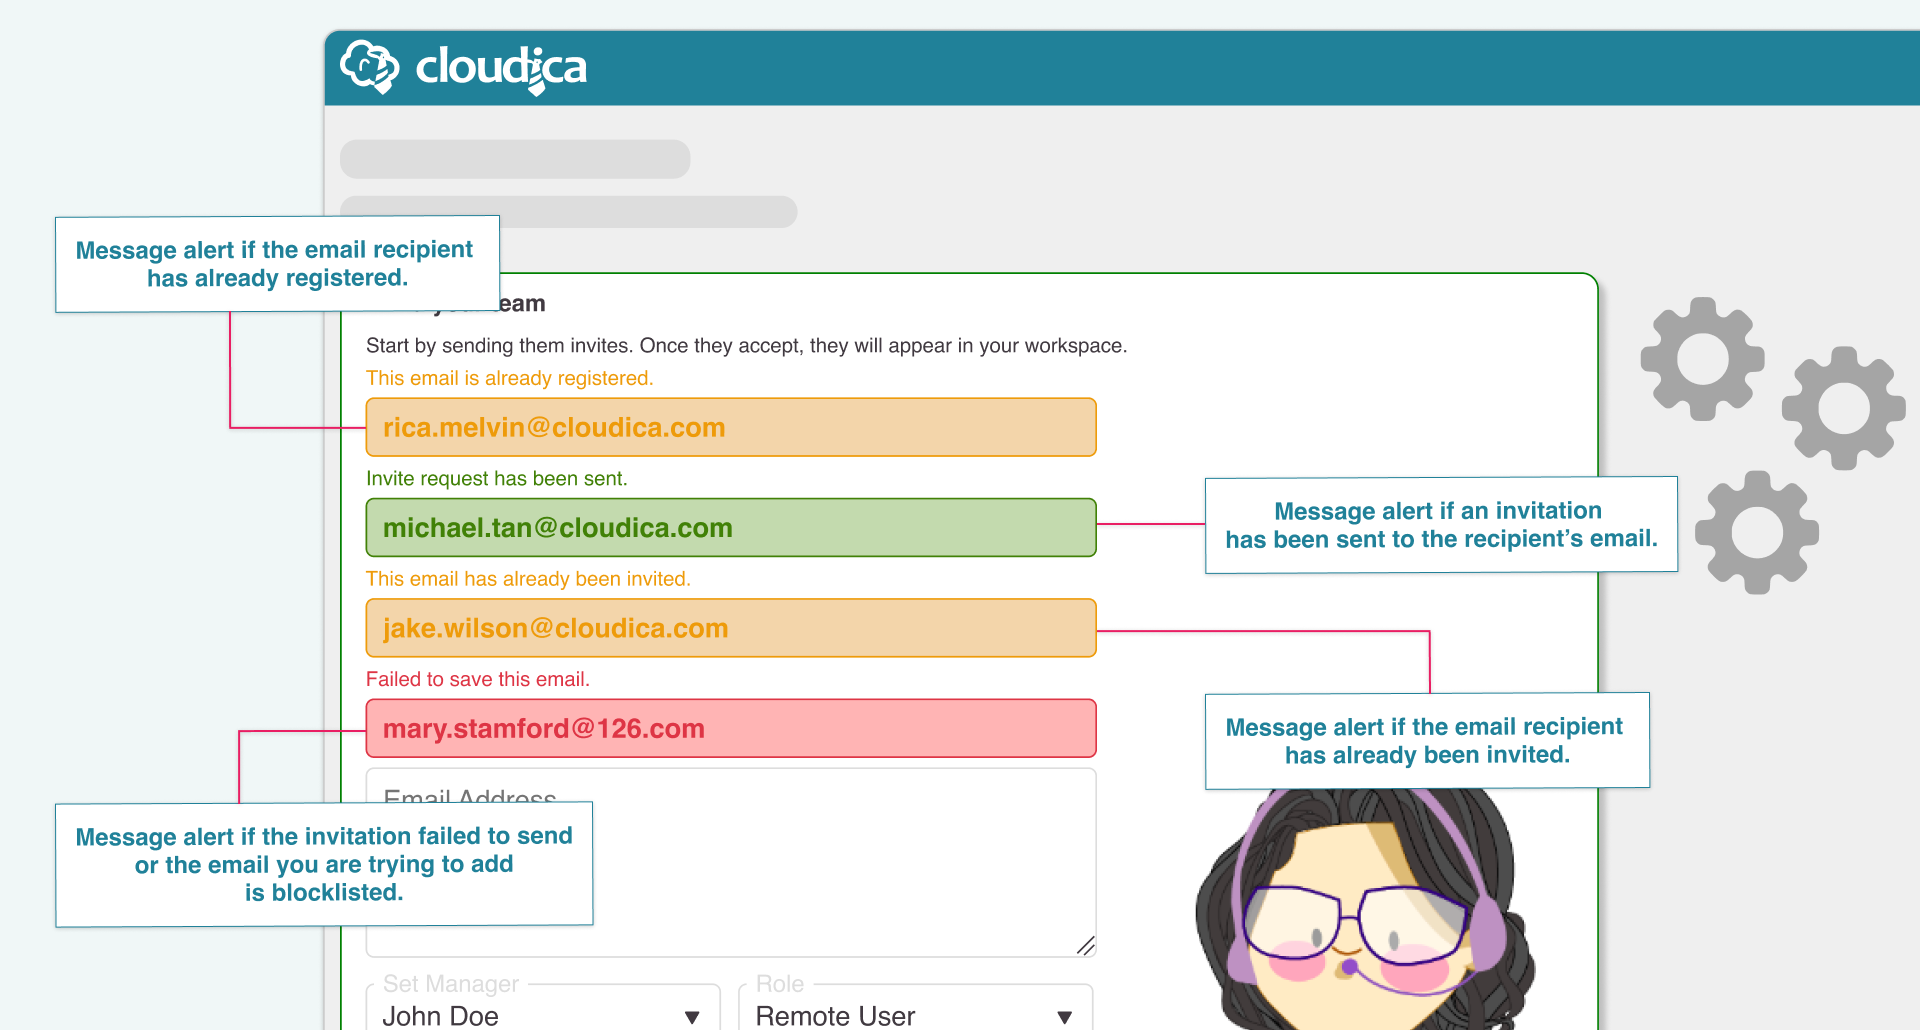
In cases of duplicate invitations or invites sent to blocklisted emails, you will see the following alerts.
 If you need to individually specify the assigned Manager, Team, or Role, invite the users one at a time instead of in batches.
Each invited user will receive an email with a link to join Cloudica™. Invited users only need to click the “Join Cloudica™” button to start setting up their accounts.
 Once the invited user chooses to join and sets up his/her Cloudica™ account, they will be automatically included in the list of Active users and the OrgChart.
Invite a user through a link
To create an invitation link for a user, do the same process of inviting a user through email.
- Look for the Invited Data box with the email address you sent the invitation to.
- Click or hover over the box. The link icon will appear within the box.
- Click the link icon to copy the link.
- Send the link to the user you wanted to invite.
 Invite users through the User Menu
An alternative way of sending user invitations is through the User Menu of the Application Dashboard.
To do that, follow these steps:
- Click the User Menu on the header of the dashboard.
- Select “Send Invite” from the options.
This will open the Invitation form. From there you can invite new users by entering their email addresses. Follow the steps mentioned at the beginning of the article to continue with the user invitation.
 Canceling an Invitation
You can also choose to cancel an invitation before the user can set up an account. To do that, follow the steps below:
- Click the “Invite” button.
- Go to the pending invites section.
- Look for the Invited Data box with the email address you sent the invitation to.
- Click or hover over the box. The X icon will appear within the box.
- Click the X icon to cancel the invitation.
 Once the invite has been canceled the link sent through email becomes invalid.
Copyright © 2025 Cloudica LLC


